Photography Tips for Beginners
20 ways to improve your photography as a beginner.
- Light is all that matters
- Photography is a journey
- Learning to see all over again
- Know where your passion lies and start with them first.
- In the beginning, don’t waste too much time on equipment
- Keep a camera with you at all times
- Enjoy the learning process
- Learn how to hold your camera properly
- Pay attention to the background
- Learn to be critical of your work – overly so
- Study the masters of your genre
- Learn how to edit in post-process
- Expose, then focus, then frame
- Always focus on the subject’s eyes
- Get prime lenses rather than zoom lenses
- Learn the camera = getting off Auto and Program modes
- Start out shooting RAW
- Learn the exposure triangle
- Learn to read a histogram
- Work on basic composition guidelines
1. Light is all that matters
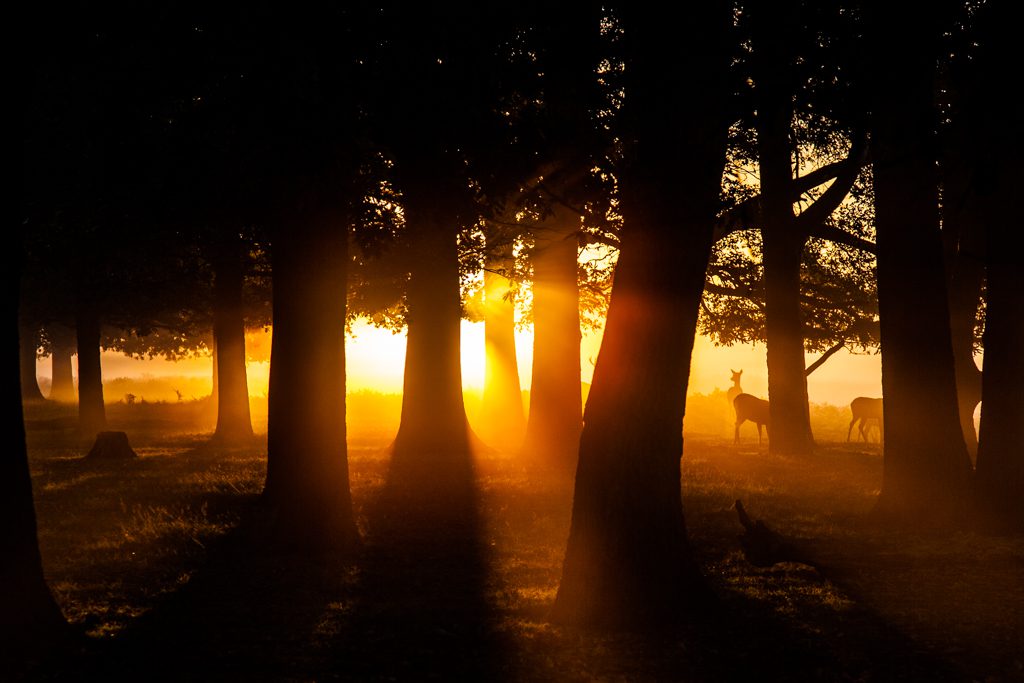
Photography is light. It’s as simple as that. The term has Greek origins and is derived from phrases meaning “drawing with light”. As you progress on your photographic journey, you’ll understand that light is all that matters.
Genre is irrelevant. Cameras are irrelevant. Composition is irrelevant. You could have the perfect subject in the world in front of you, and it would mean nothing in the pitch dark. The first thing you have to learn as a beginner is to start seeing the light around you. It’s not whether it is there or not, but whether it is warm or cool, harsh or soft, direct, reflected or diffused.
Your journey starts with looking at light and not just seeing what is lit up but also what it has not. What detail is there in the dark shadows? Understanding light means that you start to notice light vs shadows and everything in between. Together they provide contrast, depth and texture to what you want to photograph.
2. Photography is a journey
One of the most common misconceptions about photography is that you just need a camera to be a photographer. Yes, photographers need cameras, but those who’ve been doing this for a while can see photos out there without having a camera with them.
When you start, it’s natural to think it’s all about the camera you need. The trick is to remember that the camera doesn’t take the photo, it simply records what you are seeing and framing via the viewfinder.
Photography is a journey of duality where you have to understand how to operate a small technical contraption (with loads of acronyms) and be creative in how you make a photograph with the elements before you in the scene. This takes some getting used to, but once you know how to operate a camera (this is the easy bit), your journey will be all about the visual language of creativity.
3. Learning to see all over again
Part of our journey to becoming adults is about learning about the world around us. We absorb information like sponges, and then once we’ve discovered something, it gets shelved as “known”.
We walk through our lives not looking at things we’ve already processed and learnt. You may recognise the shape of a person, the colours of a signpost, and the rows of houses that line the streets we walk down. Our brain catalogues images and shapes and then packs them away, so we don’t have to analyse them anymore. Our subconscious minds are powerful things and store so much info, so we don’t have to think about them. Just think about your breathing now. You never notice yourself doing it until you stop and think about it. I guarantee that once you think about it, you’ll naturally take a big deep breath. At some point, you’ll stop thinking about breathing again.
“Seeing” out there in the world of photography is much like that. We have to force ourselves to look at things all over again, like seeing shadows, for example. We don’t even notice the contrast out there between light and dark because, at some point in our development, we noticed it, analysed it and filed it away.
The best way to start yourself seeing again is to look for mundane objects and try to photograph them. Use your smartphone, or simply imagine how you would put a small rectangle around it. Once you think you have that photo, move around and try another angle. Keep moving around it, go in close and move further back. You may get a few weird looks from passers-by as they wonder why you’re focusing on a signpost, trashcan, pot plant, park bench, or bicycle tied to a fence. You get my point. Starting to see the mundane will help you see the grander picture once again. It’s about teaching your brain to look at things long forgotten as learnt.
4. Know where your passion lies and start with them first.
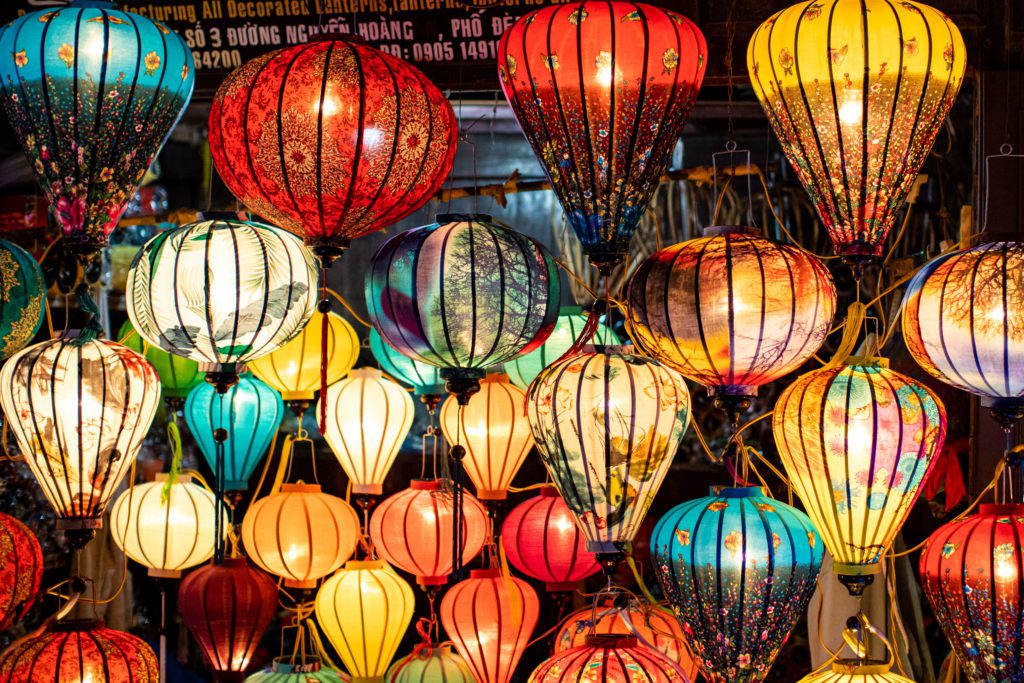
In the beginning, you’ll want to get out there and photograph everything. You may already be doing that, which is excellent. If you’re going to elevate your photography and grow as a photographer, you will eventually need to “specialise” more.
Finding that can be a hard thing to do when you are enjoying taking so many photos, but actual growth comes from looking at what you’re genuinely passionate about. The signs may already be there if you look back over all the images you have already taken. Ask yourself this, if money was no object and you started a photography business, what would get you excited?
Below is a table I produced for my photography book – Master your photographic journey. Look at the types to find what your personality type is typically drawn to, then look across to see which genres of photography could bring you joy.
I’m an introvert and grew up surrounded by nature with wide-open spaces. It was obvious to me that weddings and large events would not bring me happiness. Sure, I could have done it for the money, but my creativity would have got trampled by the stress and pressure that an extroverted person wouldn’t feel.
Genre Types
| TYPE | GENRE |
| People | Business, Candid, Fashion, Documentary, Editorial, Wedding, Family, Lifestyle, Ceremonial, Engagements, Life events, New-born, Portrait |
| Events
|
Editorial, Music, Festivals, Photojournalism, War |
| Things | Abstract, Food, Product, Indoor, Macro, Minimalist, Long-exposure |
| Nature | Wildlife, Astrophotography, Documentary, Landscape, Macro, Night, Pet, Underwater |
| Places | Travel, Architectural, cityscape, Drone, Night, Photojournalism, Real Estate, Seascape, Street, Urban exploration (urbex) |
| Activities | Adventure, Sports, Editorial |
| Aesthetic (Art) | Black and White, Composite (combining images), Creative (multiple media), Double-exposure, Fine Art, Infrared, Long-exposure, Minimalist, Still-life, Time-lapse |
If you analyse the table above, you’ll see there are some crossovers across the types. If you love people and want to shoot weddings (a large event), it means you could shoot parties, launches or press events too.
You don’t need to feel any pressure to focus on any particular one too soon, though. Take time to understand yourself as a photographer and learn about your cameras by first shooting everything you can.
5. In the beginning, don’t waste too much time on equipment
You’ll read many articles and blog posts that will tell you that your camera equipment doesn’t matter and that it’s all about you, the photographer. In essence, this is correct, but it’s also a bit misleading. As you progress on your journey and move to focus on one or two genres, they will come with specific “must-have” bits of kit.
As a long-time wildlife photographer, I quickly moved on to get a 500mm lens because it is imperative for getting me closer to hard-to-approach birds and animals. Paired with that, I had cameras that could photograph at 12 -14 frames per second for flight and action photography. Now, as an urban photographer, I don’t need those high-spec items, so I sold them all and bought smaller cameras with quality short lenses. You can read about my decisions to switch genres HERE.
When your start out, get a smaller camera and one prime lens (or quality zoom lens) and get out and shoot. Look at second-hand camera stores that offer small warranties and get them to help you with a starter combination. I have an article on how to buy your first camera HERE.
Get out there, photograph everything and learn to work with the equipment you have. With your journey evolving over time, you will need more specialist lenses or cameras that fulfil your needs. But don’t waste your time worrying about what you don’t have in the beginning.
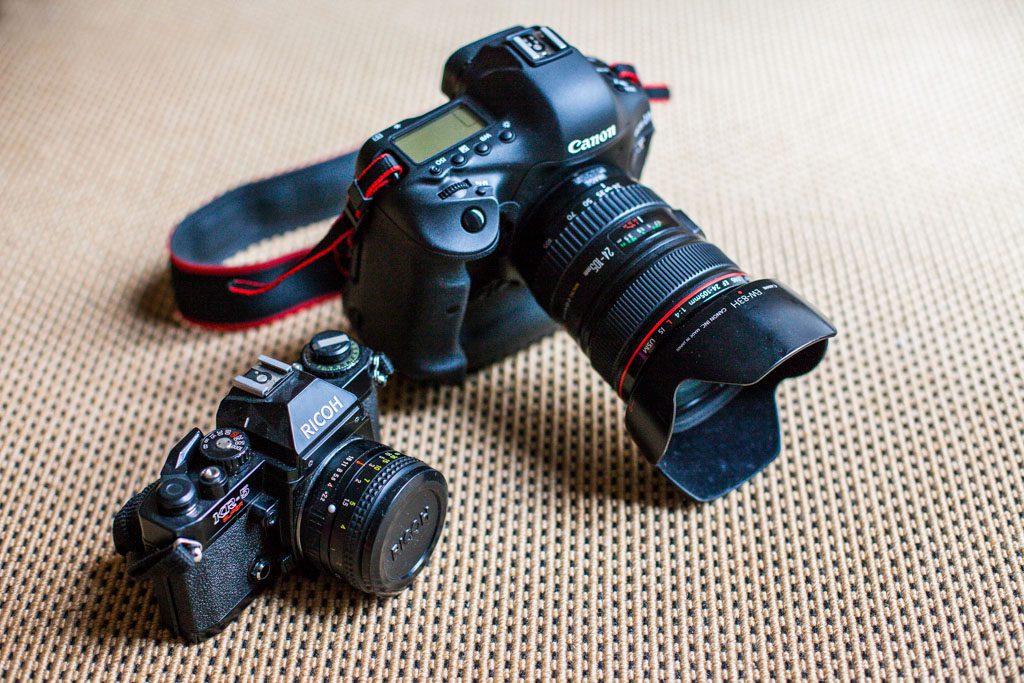
When it comes to camera equipment, start small in the early days before upscaling. The small Ricoh was the first camera I bought more than 35 years ago – still works.
6. Keep a camera with you at all times
I know it seems like a stale old cliché, but the best camera you have is the one on you at the time. At the moment, we all have smartphones with great little cameras, quick editing and instant access to the internet. Start with this if you don’t have a camera because you can play around with composition and get to grips with some of the guidelines that form the basis of a good photograph.
I don’t use my smartphone because I have a camera with me, and I have spectacles, so I would have to keep taking them off and putting them back on all the time. Get into the habit of taking your camera with you. If you see something that interests you, stop and take a photo. Never leave home without a camera (or at least our phone). You’re a photographer now.
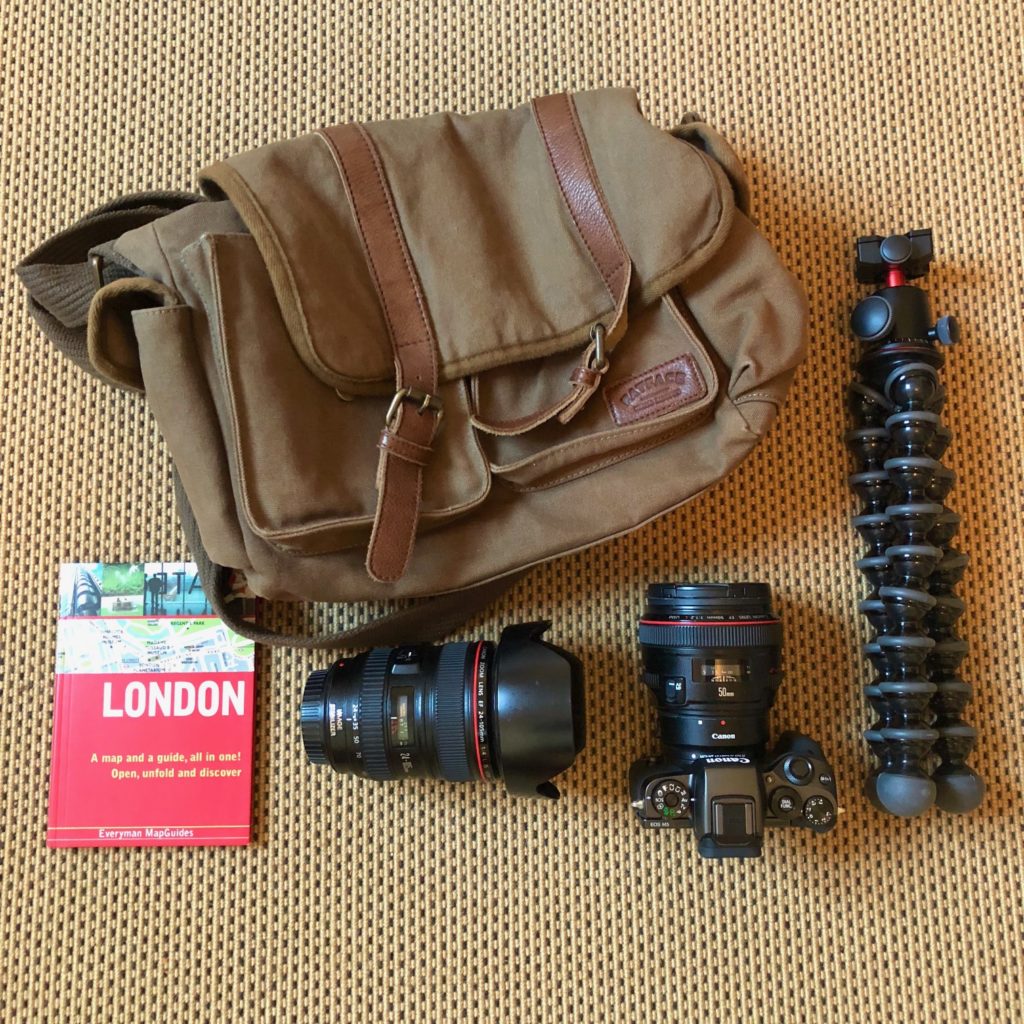
My kit for a typical day on the street
7. Enjoy the learning process
Keep learning. No matter what you believe, you will not take good photographs from the outset. Sorry to tell you that hard truth here. You may be the most creative person on the planet, but you have to learn how to record your vision via a camera that does things differently from how you see them.
Try, fail, learn, try again, fail again, learn again. Play and make mistakes – have fun with what you are passionate about. Learning comes from experimenting and getting it wrong. So have fun getting it wrong as many times as you can. It costs you nothing to take a photo and delete it if it doesn’t work.
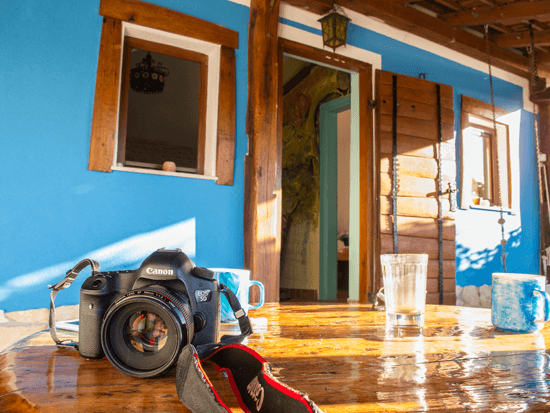
8. Learn how to hold your camera properly
Camera shake is one of the main reasons photos aren’t pin-sharp or look soft, as is sometimes said. This means that just as the shutter is open and the light is streaming in, your camera moves, resulting in blurred details.
So much shake can be eliminated by simply holding the camera correctly. This has to be learnt and practised, so it becomes natural to you. The key is your elbows. If they are spread outwards, you lose that core stability that you, as a human, use to stay upright.
Rest the camera in the palm of your left hand with your thumb and forefinger cradling the lens. This is also how you can move the focus or zoom ring on the lens. Your left hand should never leave the base of the camera because that replicates a tripod head. Tuck our left elbow into your side, and you have a secure base plus a solid grip. This all leaves your right hand free to gently squeeze the shutter release button and dial in any settings on the top of the camera.
Another tool for stability is, of course, to use a tripod. This is for supreme stability and is needed for low light and landscape photography. Also, be on the lookout for walls, fences or gateposts to lean against because these can serve as additional stabilising elements.
9. Pay attention to the background
We see in three dimensions which shows terrific depth and pushes things in the background further back from your main subject. A photograph is two-dimensional, so the background and foreground appear closer to one another or compressed. Things that don’t appear distracting from your subject when you use your eyes suddenly appear to crowd our subject. They distract the viewer away from the model, who suddenly seems to have a lamppost growing out of her head. Other things like branches, light switches, fire extinguishers and busy wallpaper are all distractions that detract from the subject and make the photo look overly cluttered.
Watch your background when you compose the image while looking through the viewfinder.
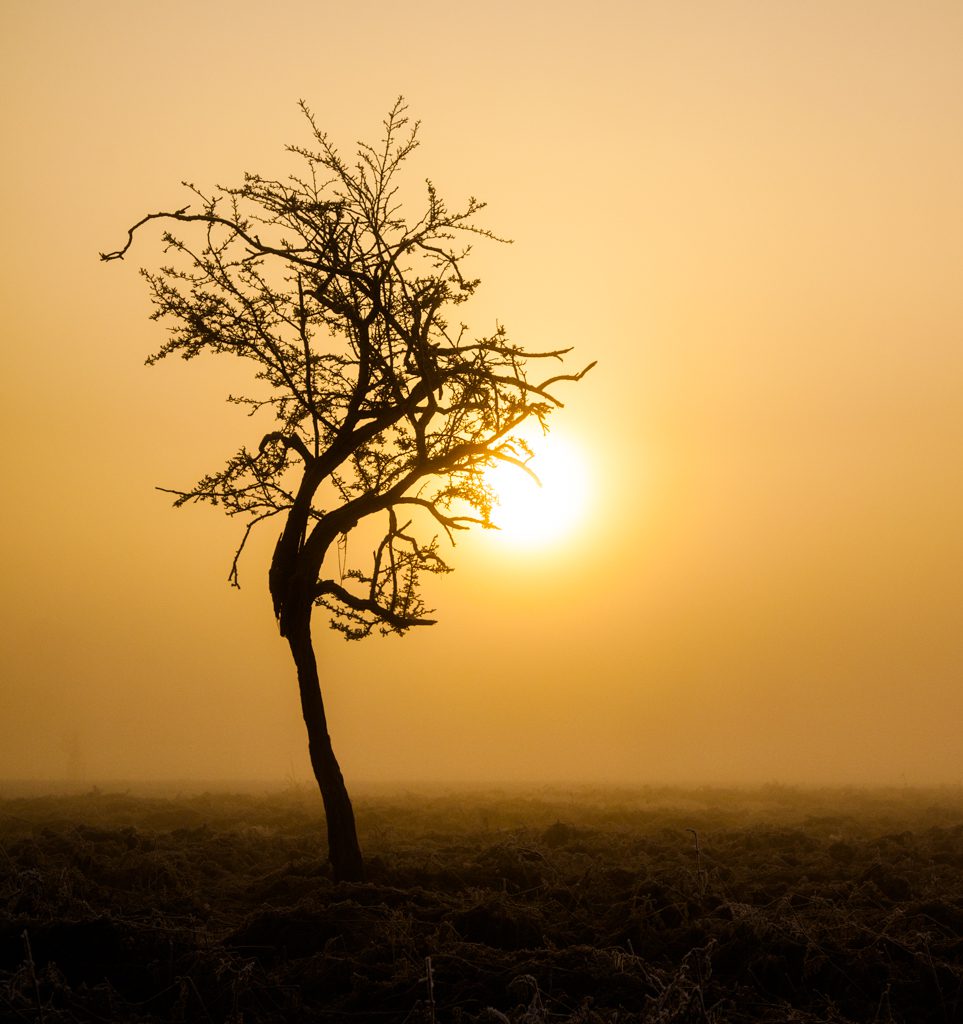
10. Learn to be critical of your work – overly so
I’m also a fiction author, and a known statement is that anyone can create a first draft, but a true writer earns their stripes during the first edit. Anyone can lift a camera and take a photograph, but it’s a real skill to select and edit your best work, whether in-camera or in the editing software on your laptop.
In-camera – When looking through your viewfinder, you’re seeing what your camera and lens combination is seeing. Here you need to check the background, your exposure settings, composition and framing. If you find yourself thinking – I can fix this in photoshop, you’re short-changing yourself. Get it right in-camera at every opportunity because this saves time during editing.
In editing – You will have a whole series of images from a day of shooting, and now you need to be a ruthless critic of your own work. If it’s blurred, delete it. If the person’s or animals’ eyes are not in focus or they’re closed, delete it. You want to get better at being a photographer, which means you need to be better at understanding what a good photo is. Set your standards higher than just average. Don’t accept substandard work in your portfolio. Your viewers sure as hell won’t.
11. Study the masters of your genre
Part of your journey to being a better photographer is studying the masters of your genre. This is not your best friend on Instagram who takes a few good photos. I’m talking about the vast bodies of works that the masters of the past fifty years have created.
There are hundreds of great books that they have produced out there that showcase their work. Get your hands on them and study each of their photos within the context of their overall body of work. Tip: Never judge a photographer by a single photo – always look at their body of work.
I constantly go to garage sales and book sales to look for cheap photography books. While there is a measure of nostalgia in that, for me, these men and women were going about their craft without the pressure of creating content for likes, followers or fame.
12. Learn how to edit in post-process
The editing process at home comprises two areas – selecting what is good enough and getting the image ready for sharing.
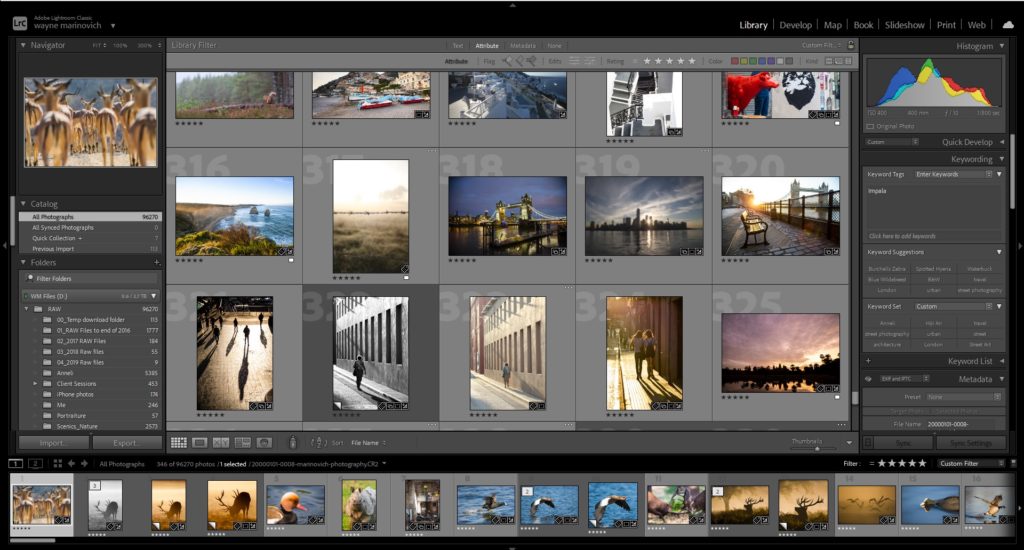
Whether you’re shooting in RAW or Jpeg formats, you’ll have to import the image and do some processing of sorts. There are many third-party editing software packages out there for you to use, and most camera brands will also give you access to their version of an image editor for free.
I use Adobe Creative Cloud, which has a fixed monthly fee, so I always have access to the latest versions of Photoshop, Lightroom (and others). I used to buy the full software package but would then have to buy subsequent upgrades as the tech improved, so I like this subscription model better. At the time of writing, it is about $20 per month, which I feel is cheap if you’re doing this as a business. There are more affordable software packages, so spend time researching those.
Teach yourself all there is to know about editing your exposure, temperature, contrasts, textures and saturation. Leave the presets, filters etc., for later because those presets are available to everyone. Why would you want your work to look like everyone else’s out there without understanding how to edit the detail yourself?
Tip: When it comes to selecting images, if you have the slightest feeling in your gut that it’s not a good photo, I guarantee you it is not. Listen to your creative instinct and bin it. Don’t share it because a few people who love you tell you it is great. Deep down, as a creative, you’ll know you have let yourself down, not in taking the photo, but in sharing sub-par work below your high standards.
13. Expose, then focus, then frame
Expose, then Focus, then Frame. This is one of the best sentences you should repeat to yourself before taking any photos.
- Expose – Is my exposure correct for the scene? This is your exposure triangle of aperture, shutter speed, and ISO.
- Focus – What do I want the focus point to be? Whether it’s a landscape photo or a portrait of a running dog, decide how you want to focus it.
- Frame – how will I frame the picture around the subject? This will be done by moving your camera until the elements or subjects are composed in the frame of your viewfinder (and hence the photo) before you press the shutter release button.
14. Always focus on the subject’s eyes
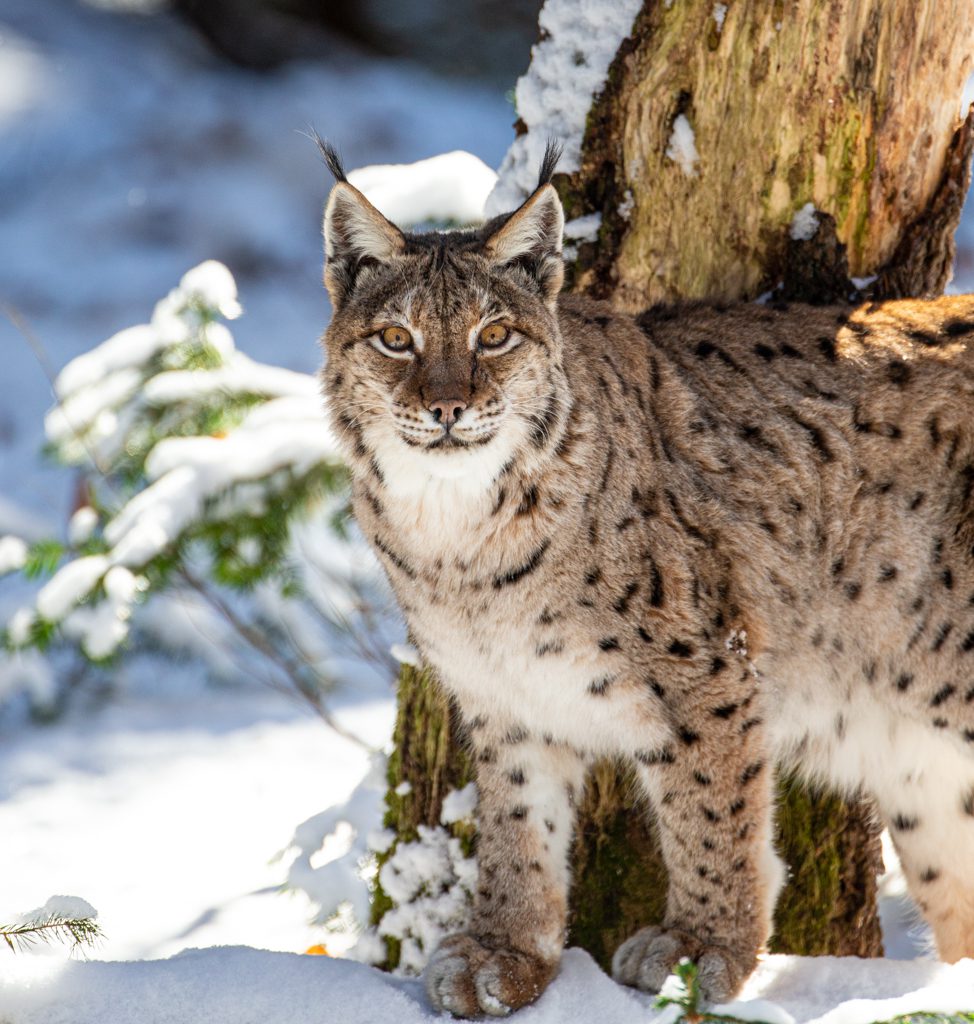
The eyes are the windows to the soul and should be the main focus of your portraiture, even if the person or animal is not looking straight down your lens. Always check when you have taken the picture that their eyes are sharp – and open.
15. Get prime lenses rather than zoom lenses
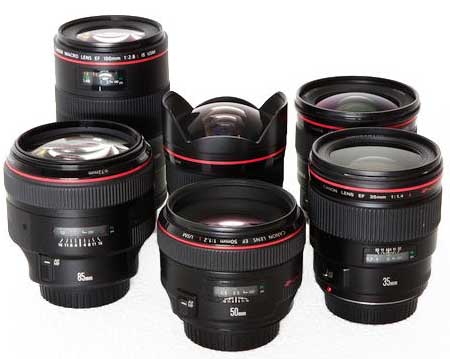
Prime lenses (35mm, 50mm, 85mm etc.) are more simply constructed because they have no moving parts, i.e. they have fixed optical glass lenses inside. Zoom lenses, on the other hand (16-35mm, 24-70, 70-200mm etc.), have moving lenses that are shifted inwards and outwards through the focal range. While they are still of good quality, prime lenses tend always to be sharper.
You can either pay a little bit more for the same brand of lens as your camera or go for third-party brands, like Tamron or Sigma, which offer a cheaper alternative without much quality loss. It depends on your budget.
Speaking of budget, as a general rule, I always suggest spending more on your lenses than on your cameras. This is because light has to pass through several prisms of lens glass to get to the sensor. Your camera is just a box that records that light.
Get into the habit of using a prime and then moving closer or further from your subject or scene. Let your feet become your zoom. The act of actually moving means that your perspective will constantly change, and you may notice a new angle or perspective that you’d miss if all you did was zoom in or out with a lens.
16. Learn the camera = getting off Auto and Program modes
In the beginning, you will set it to Auto and Program mode and simply go out and photograph things. This is an excellent way to ease yourself into photography. Pretty soon as you start editing your photos, you’ll notice exposure problems, blurred images and other things that have ruined your work.
Learn what all the camera modes do, then trust that you will find one that suits the way you shoot. Don’t buy into the myth that you are not a proper photographer unless you only shoot in “Manual” mode. Sure, play around with it for a while, so you understand what it means and does to the way you shoot, but ignore the armchair purist nonsense. A camera is a tool, so use it however you choose to get the great photos you want.
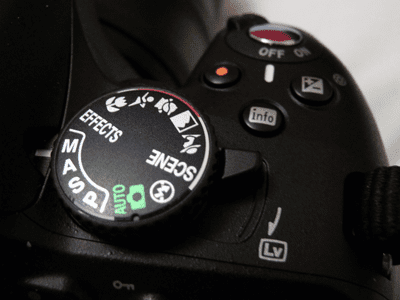
To be a better photographer who constantly grows, you need to get to grips with your camera. It doesn’t matter what camera you have – a smartphone all the way up to a professional camera – you need to understand what it does and what it can do.
“I’m not technically minded” is an excuse that you cannot afford to have on your journey to being the best photographer you can be. There are two aspects to photography, the technical side and the creative visual side. Anyone can master their camera with a bit of training or self-learning. Remember, you don’t need to know everything because there are many things you simply won’t use – understand what they mean, then forget about them.
Learning your camera can be done in a short space of time. Much like riding a bicycle, it is a struggle for a short time, then one day, it sorts of clicks, and all comes together. On the other hand, your creative side will be a journey that spans decades – and that is the exciting thing and why we all do photography – constantly chasing that perfect photo.
17. Start out shooting RAW
Start shooting in the RAW format as soon as possible. Like Jpeg files, RAW is a file format where your camera writes all the information of your digital image to your memory card so that you can fully edit it later.
RAW is similar to an old film negative that you have to process using software. It’s a lot more forgiving of your exposure errors which you can rectify in the software. A Jpeg file is the most commonly used digital format used. It’s the compressed image that has had all the settings you set in your camera applied to it and is compatible with all web browsers. The file is compressed within the camera itself, so you don’t need to do it, but this means you have to get it right in-camera when you shoot.
It’s best to shoot in RAW mode rather than Jpeg because it gives you more flexibility in the editing process. Try both and see how it affects your editing workflow.
18. Learn the exposure triangle
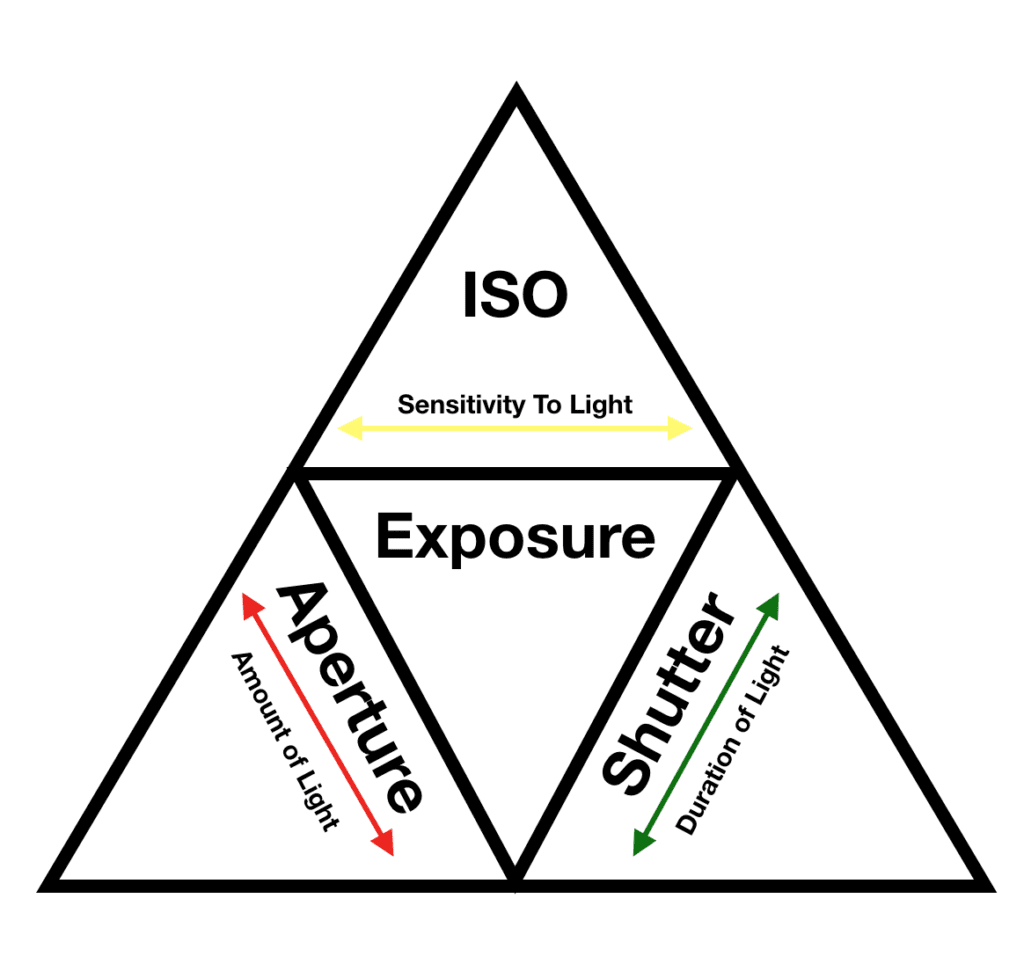
While I understand that geometry was probably not everyone’s favourite subject, one of the fundamentals of a triangle is that if you change the angle of any one of the three corners, the other two will also change. This is no different when it comes to the exposure triangle. The triangle metaphor represents the three critical aspects of photography you have to master consistently to get all those great photographs you’re going to get.
The three key corners are the aperture, shutter speed and ISO. They are the critical components to correctly exposing every photograph. Whether you shoot in Aperture mode, Shutterspeed mode, or Manual mode, playing around and continually experimenting with these three aspects will push your knowledge and creativity.
19. Learn to read a histogram
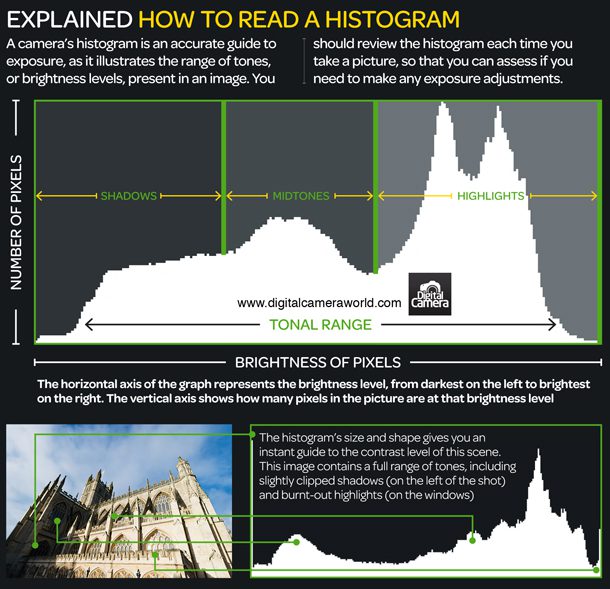
Another great tool to come from the digital age. A histogram is an approximate representation of the distribution of numerical data of the raw image. So, what does that mean in the photography space? Essentially, it is the distribution of light throughout the digital image representing the shadows (dark spaces), midtones, and highlights (bright areas)
Credit: Digital Photography Magazine
Once you’ve taken a photo of the scene in front of you, it’s possible to see the detail of the exposure, contrast and brightness of the scene. That’s the absolute beauty of digital photography over the much slower method of feedback you get in film photography.
The sensor doesn’t lie, and the data it has recorded is what you see when you look at the histogram – a digital representation of the scene in front of you using your exposure settings.
If the graph is weighted to the left-hand side, your image may be too dark (underexposed). If there is a lot of data on the right-hand side, it may be too bright (overexposed). By changing one of the three elements of the exposure triangle, you can get to the correct exposure.
20. Work on basic composition guidelines
All art comes with basic “rules” or guidelines of what constitutes composition and artistic structure. Photography is no different, although I prefer to call them parameters rather than rules. This classification has always seemed so final and binding to me and leaves no real room to create.
In the beginning, everyone photographs in a similar manner as they work through understanding the basic composition guidelines. That is part of your journey. Over time, if you stick with photography and find your creative passions, you will begin to develop a style that is unique to you. It will become your photography. Your own style allows you to push the barriers of fear to make a body of work that showcases how you see the world. A style that uses composition and structure to lure the viewer into your images and hold them there for a few fleeting seconds.
These are just some of the basic tips I can give you as you begin your photography journey. There are countless more in this incredible hobby (or career). If you are in London or Brighton in the United Kingdom and would like to have more 1-2-1 camera training, why not book a course? More information here – BASICS OF DIGITAL PHOTOGRAPHY COURSE
Other Photography Tip links
